Friday, October 23, 2015

Sound Levels in Cinemas

Interesting article...missing some information, though, such as weighting network and response speeds used to measure....

http://kxan.com/2014/02/14/testing-movie-theater-volume-too-loud


Tuesday, March 11, 2014

AV Travel, Tech Planning and Troubleshooting - The Mobile AV Workplace

I've traveled to quite a few cities in Canada and the US providing AV services and every trip is truly unique! From planning my transportation to going over AV quotes to planning my set-ups - not to mention losing sleep and eating non-perishables in my hotel rooms - every event I attend means learning something new or having a new experience.

This event I'm writing about today takes place in Vancouver, B.C., today, March 11th, 2014. 

The flight was pretty normal, although I usually plan to sit in the front of the plane if possible, because I like to get out of the darn thing asap. Sunday's flight was jammed, however, due to March Break.


When flights are smooth, I often work on AV equipment lists and planning, then find out what surprises are in store for me when I get to the actual site.

My floor plan was to match the quote for AV rentals and there had already been some slight mis-communication about the type and amount of cables required for the workshop on the first day. Normally, workshops are much smaller than the associated main event, therefore they do not require much audio support. 

Problem #1 - missing cables!

When I arrived, I discovered that the requested gear was there, but without any cabling or A/C power drops, so I couldn't do much of a set-up the night before, which meant that I had to get up extra early to fix the situation in the morning. First thing in the morning, I contacted the house AV, then borrowed an extension cord from the banquet manager as back-up, ran up to my hotel room to get a portable audio mixer, met with the on-site AV person (who agreed that there should have been cables left the night before) and we were ready to go.

After being polite, being calm under pressure and thanking the AV staff for the help, I opened up a clear line of communication in order to plan that night's set-up for the following morning. I triple-checked the AV order for the next morning, which I was to set up the night before, and finalized the floor-plan. I then went to Dollarama to get a couple of cheap power bars as back-up (and some back-up batteries for the wireless mics).

Once the floor-plan was finalized, I emailed it to the house AV team, who could then see exactly what I had planned, with every major cable shown (not the smaller connections at the audio mixer, which I usually carry with me).

The banquet staff had a slightly different floor-plan, based on estimated equipment location and seating arrangement, but from my experience, the banquet floor-plan and the AV floor-plan are often not exactly the same. I usually get around this problem by talking about it face to face and adjusting some of the potential problems, such as the common problem of missing projector tables on many banquet floor-plans, with approximate projector throw distances (projectors can be swapped out at a moment's notice, and they are all different).

Problem #2 - wireless mic not working!

Now that the viewing angles, podium position, AV gear and staging were all taken care of, I found myself faced with a problem with a wireless Q&A mic (this event required a roaming mic for questions and answers).

 I had rented two new digital wireless units in Toronto, to take with me because the receivers were small, light, easy to operate and unlikely to experience interference on their frequency range. I had used similar units before so I didn't anticipate any problems. After a 2.5 hour set-up, I was now faced with the possibility of telling the meeting planner in the morning that they may need to rent a wireless mic and absorb the cost (not what they want to hear, of course, because they also paid for the rental from Toronto). 

Before delivering the bad news, I decided to take the wireless unit to my hotel room and try to figure out what the problem was at the expense of a good night's sleep. After fiddling with the controls and doing many web searches, I stumbled upon a chat page which led to another page that explained that these units were interchangeable and backward compatible. By pressing the two buttons on the transmitter in a certain sequence, the user could change between 'newer' and 'older' wireless signals (they often don't supply the manual for rentals). 

After 1.5 hours, I now had a working wireless unit! Now, time to try to get 4 hours of sleep (it's okay, they have good coffee at the hotel).

Problem # 3 - video playback files a mess!

Actually, while I was working on the wireless, I also had to make a plan to get the videos into the PowerPoints for the next day. I had to download a large file a few hours before, then test it, then download two Youtube videos, convert them to .wmv, embed them and test them, then pre-stream a non-down-loadable video and have it ready in an open browser. Most of this was due to last-minute submissions that I couldn't test until the night before the event.

It was a busy night and even busier morning as I had organized the videos and came up with a plan of action, after speaking with the presenters. By carefully adjusting my AV control sheet and prepping the videos, I was now ready for playback on demand. 

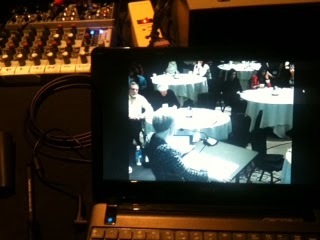
In our set-up, the AV tech table is behind the screen (AV Ninja tm) and a comfort monitor is set up beside the podium - that way, we have full control over the computer to ensure seamless playback and we are also
very close to the presenter for support in case anything goes wrong while presenting (better than running through a crowded room to help!).

So far (knock on wood), we have avoided serious issues with the AV quality and made sure every presenter was taken care of, so that the audience could get their money's worth and enjoy the event without major technology glitches. This was achieved with a combination of quick thinking, trouble shooting and making friends with the on-site banquet and AV staff.

I must mention that the on-site staff, both AV and Banquets, were very helpful, responsive and understanding during the cable crisis and even checked on the event a few times to make sure we were doing alright (Hyatt Regency Vancouver and Freeman AV).

So far, this is a typical 'away' event, although with its unique issues and experiences.

Buck Moore, www.b4ushowit.com

Thursday, September 26, 2013

When Agendas Go Wrong! How to Follow a Conference or Event Itinerary

Conference itineraries only work really well when:
A) they are realistically and meticulously planned
B) they are followed as closely as possible
C) all site details are accounted for
D) site staff (banquet staff and AV staff) communicate properly

If any one of those items are not explored, there will be a fly in the ointment. If none are explored, you will have a nightmare brewing, as not only will one problem result, but possibly (probably) a few problems down the line as a result (the ripple effect).

Let's explore some typical agenda problems and some solutions:
An event in Mississauga, Ontario, Sept 24, 2013 - I'm hiding here somewhere!

1) Running behind schedule
At any event, there is either a stage manager or meeting planner or chair person who makes sure an agenda is followed. There are always ways to keep things on time, and they'd better be considered beforehand because some people (talent, speakers, musicians, comedians, MC's, etc) get downright upset if things change, and it's just plain 'not fair' to anyone who is going to be facing an audience, not to mention the audience itself.

Typical schedule problems include presenters who just won't stop talking, a chair person who makes their own itinerary adjustments without consulting the meeting planner, audience members who make long statements rather than ask simple questions, and bands who either 'can't find their singer' when they should have already started, or won't stop playing when their time runs out. When dealing with humans, there will always be such problems, but there are also always effective solutions.

Solutions:
  • Warn the presenter ahead of time that there will be time cards flashed at them with 'time left' printed in minutes. Usually, 10-minute, 5-minute and 2-minute warnings will suffice.
  • Express to the presenter ahead of time how important it is for them to work within their time slot, leaving the last few minutes for questions.
  • Remind the chair person (or moderator) that scheduled breaks and luncheons must be given on time, as being late affects many people behind the scenes, who are following strict, often complicated schedules. Banquet staff and AV teams rely on very  tight schedules to do a lot of planned work within a very short period of time. 
  • Warn bands and musical talent ahead of time that they must start and stop on time, so they should have a properly timed set list written, allowing time for an encore. Also mention that if they play more than 2 minutes over their set time, the sound system will be shut off. Musicians are notorious for not understanding the concept of 'time', unless it refers to the music they play (it's okay, I've been performing for over 20 years; this is the truth).
  • Ask bands to provide a stage plot and input list ahead of time, unless they have a standard 'backline' (guitar amps, bass amp, drums and keyboards).
  • Ask the bands to share as much of the backline as possible, and to set up complicated keyboard rigs ahead of time, but off to the side of the stage. Drums and other complicated set-ups waste precious time at busy events.

2) Last minute changes
Event planners and meeting planners should be aware of ANY change that is wanting to be made. Every last-minute change must go through the on-site meeting or event planner or it will not be guaranteed. Here's an example of a bad last minute change: A chair person at a corporate conference cuts a break in half and lets the audience know. Little did they know, this directly affects any on-site corporate sponsors. On-site event sponsors are promised a certain amount of face time with the audience (it's a selling point) and they will get very upset if the audience only has enough time to go to the bathroom and grab a coffee and not be able to visit the sponsor booths.

Very often, my team is asked to play a video or make a complicated last minute change to a presentation, which can include fixing broken slide-show links, downloading and converting videos or searching for YouTube videos that a presenter all-of-a-sudden remembers but doesn't quite know how to find it. Our team is very, very busy behind the scenes and a 30 minute break often means 27 minutes of work, leaving 3 minutes for us to do personal stuff (we are humans and need breaks as well).

I've worked events where MC's would make 'special announcements' because they've decided to allow a special guest perform one song right before the third of four acts. Well, if that special guest is asked to play another song, they usually will. Then the MC may come back up and say a few more words, or they may decide that it is a good time to hand out door prizes, even though it wasn't on the agenda. Now the third act is 20 minutes late starting and the headliner will either be late as well, or ask the third act to cut their set short.

Solutions:
  • Before the event, remind all chair persons or moderators that all scheduled breaks must be adhered to and give them solid reasons why that is. If they are a last-minute replacement person, be sure to thoroughly brief them and be prepared to have one of your staff use a wireless microphone to delicately interrupt and announce the break, if the briefing didn't work.
  • If the break is late, despite your best efforts to avoid it, extend the break and make up the time with a shortened lunch period.
  • At a live music event, hire an experienced stage manager (or get a good volunteer) to facilitate the smooth execution of the schedule and do not allow any 'special' guests who are not on the schedule to perform, unless the following acts are okay with it. If so, stress that they have 'one song' and that's it.
  • If a party is going late and the party planner wants the DJ to keep spinning, the DJ must immediately advise the venue manager or rep. It is not up to the DJ to extend an event and most venues have plans right after the scheduled stop times. Have a plan in place where the crowd is gently warned a couple of times that the party will stop on schedule. Also, the drunker the crowd gets, the more chance of hostile behavior when the music stops.
  • To get an inebriated crowd to slow down, I used to turn the music down, little by little, then increase the lights by a bit. Then, I would finally fade the last song out so gradually that nobody really noticed. This process takes about 15 minutes. If you stop the music abruptly, it won't go over very well, that I promise.

I hope these problems won't happen at your next event, and if they do, I trust you will have a solution ready to go as a part of your proactive event plan. Cheers!

- Buck Moore (www.b4ushowit.com)

Wednesday, July 31, 2013

How to tune a PA system, Ringing Out Feedback for live sound systems and stage monitors in clubs, churches, etc

Here is a collection of short live sound instructional videos by me, Buck Moore. Buck has been setting up and operating sound systems in various North American cities for over 15 years. I, Buck, have also been the live sound instructor at Toronto's Trebas Institute since 2001. These techniques come from thousands of live shows in good rooms, bad rooms, with good gear, bad gear, with good talent and bad talent.

In summary, these are the most reliable techniques I have been using so far. Since they work every time, I stick with them. I hope you try them out to see for yourselves, and even develop your own techniques; I'd love to hear about them. If we can improve the average live show by even 50%, all techniques combined will have paid off!

All I am doing here is trying my darnedest to improve live sound everywhere. Cheers!


Saturday, October 6, 2012

Will Club Sound Techs Become Obsolete? Will Digital Sound Systems Run Themselves?


Once a precedent is set, it may never go away. 

With the advent of digital mixing boards, users can clearly see the benefits - saving mixes for shows on a USB key, presets for front-of-house, monitors and effects, RTA, crossovers and even optimum 31 band EQ selections for typical performances; just don't tell the club owner too much about how easy it is!

As digital mixers come down in price, more clubs will be talked into owning them at the word of the house sound technician because the tech will want to learn digital mixing without buying their own board. This may also ensure that the house tech has guaranteed themselves a position, for a little while anyway, as they will know the system inside and out; and until other techs know specific mixers, there will be fewer choices of who to hire for a show.

By insisting on, or strongly suggesting digital mixers to a club owner, sound techs may be shooting themselves in the foot simply because situations will arise where the club hasn't got a sound person for the evening and will scramble to find someone who knows a particular digital mixer during the 'learning phase' of the digital club sound revolution (the phase we are beginning to enter). If the club owner doesn't find someone and the absent sound tech calls them and tells them to select 'Preset D' for a returning act, the club owner will now begin to see the potential of saving money at shows.

If an entire mix can be saved on a USB key for a particular act, and the mixers become more intelligent and are able to adjust the mix by sensing certain sound waveform information, then the club owner may only hire a house tech for 'certain shows', like new bands or high profile events, as they will no longer need to hire the sound tech for every show.

Think it can't happen? It is already happening in the analog world! Sound techs are sometimes asked to set up DJ's but not stick around to monitor the sound system. They are also asked to set up simple things such as workshops, panel discussions and other 'non-musical' events. Without proper monitoring, all hell can break loose during a show (I've been there many times).

So, how can sound techs protect their positions and get more work? Here are some suggestions in the dawn of the age of digital club systems:

1) Solidify your liaison skills - be a people person and demonstrate your importance as a sound tech. Be the 'go to' person in the club who communicates on behalf of musical talent, bar staff and management.

2)  Stress the importance of and be good at troubleshooting - when there is a problem, be sure to let everyone know about it and how you solved it. This can come up in a casual conversation after the show, when nobody had any idea there was a problem, or in the case of an obvious problem, be sure to solve it quickly! TIP - always ask "What if 'this' happened?" and have a plan B and a plan C! be proactive!

3) Raise your rates for emergency calls - create a rate sheet for certain services if they start using your services less.

4) Don't give away all of your secrets - every sound person or AV technician has tricks of the trade. Be careful of who you tell these to! Your secrets are partially what keep you valuable. I have solved many on-site problems with my bag of tricks. I let the people know what the problem was and that I had a solution. But, I was once asked by a meeting planner if I could make a list of my break-out kits so she could buy some and have them ready. I told her that every situation is different and it takes more than just a few cables and connectors to solve a problem, and that critical thinking is involved (something a digital console can't 'yet' do).

Summary - digital mixers are coming down in price. Whatever analog skills a sound tech has may not be good enough without learning the skills I suggest above. Mark my words - when a club owner sees potential for saving money, they will jump at the chance! Now it's time for us to play the game differently.

Buck Moore,
Owner, B4UShowit.com

Tuesday, June 26, 2012

How to Put Video Into a PowerPoint Presentation (Embedding Video)

In the earlier days of PowerPoint, almost every presentation I was given to prepare came to me via floppy disc. Now, we have the ubiquitous, hot-swappable USB key with tons of storage. We also have a stronger need for playing back videos from within the presentation, to make our presentations as seamless as possible. But, few presenters know how to fully prepare a video for their presentation.

Thankfully, the methods and software for downloading and editing video for presentations are simple and easy to use. One of the most popular sources of video for presentations is YouTube, who make it a pretty painless process. But, how do you get the video and how do you convert it to a useable format? It's easy! (and all the links are at the bottom)

Downloading the video from YouTube

My first choice for downloading and converting YouTube videos is YouTube Downloader, a free program that allows you to download and convert, in separate steps (the paid version does it in one, easy step, however). Here's how it's done:
1. find the video
2. open YouTube Downloader (after installing it on your computer - PC compatible)
3. copy the video's link from the address bar or from the 'share' bar below the video
4. paste the link into YouTube downloader (it actually does this automatically as you go back to the program)
5. select the 'save to' folder of your choice and click 'download'
6. go to the 'convert' tab and select the video from the folder you saved to, then use the drop-down menu to choose your desired format (hint - use .wmv for Windows PowerPoint)
Done!

Converting other video formats to be used with PowerPoint

If you download an .mp4 or Quicktime, you will need to convert it to .wmv. Simply go to Sony Media Software's site (link below) and try Vegas Movie Studio HD11 (or whatever the newest version is). Try it free for 30 days, but if you really want it, it only costs about $45.00!! Pretty awesome product for that price, trust me! Vegas Movie Studio HD will be able to read tons of formats and convert to just about any format you would ever need, but stick with .WMV (3Mbps Standard Definition, or 6Mbps HD), for a high quality, but small file.

1. drag the video onto the vegas timeline
2. highlight the file on the timeline
3. click on 'Project', then 'Render As...'
4. the pop-up window will show all the different options, but choose .WMV for Windows (as stated above)
5. click on 'Render Loop Region Only' below the render options, so that it only renders what is highlighted
 Done!

Embedding video into PowerPoint

1. create a file folder on your desktop and keep your presentation there  (this is best if you are using a host computer, so that the file is easy to find and has all of the videos in the same file)
2. open your presentation from the desktop folder and create a blank slide from which you want to show your video
3. click on 'insert video' to locate your video from the desktop folder
4. click the video file to highlight it (a big square will surround it on the new slide and a new control tab will appear at top right) click on 'play automatically' or 'on mouse click' (these controls change ever so slightly with every new version of PowerPoint).
5. try it out by getting into slide show mode, just a slide or two ahead of the video slide and advancing until you get to the video slide to see if it works

Tip - be sure your audio control is at least 75% up for seamless integration into sound systems.

Cheers! Buck Moore (info@b4ushowit.com)


Wednesday, March 7, 2012

AV Horror Stories - Venue Equipment and Communication


So, if you've read any previous posts or my website at b4ushowit.com, you'll probably know that I have worked at over 4,000 live events, many hundreds of which have been corporate meetings at hotels and convention centres. I strive for perfection at every event, but it doesn't exactly work when I get little, if any, prompt co-operation from the banquet staff and on-site AV staff.

Lack of prompt co-operation from on-site staff is nothing new and certainly not limited to the event scene in Toronto, where I primarily work. From 2005 until 2009, I had the opportunity to travel around to many different US cities performing the same services as I do in Toronto, which was both an eye-opening experience in that the way things are done in various regions are not that different from what is done where I normally work.

In fact, one of the newest and most prestigious venues in Las Vegas (in 2006)  had the exact same audio issues as an older in Toronto (one built in 1981). It turns out that the sound systems in both hotels were not working as they should; the former had issues with the way it was set up, the latter simply because of age and neglect. Add to that the attitude of the staff members and one can easily see that these are typical problems that must be dealt with.

I will now share a list of AV problems I recently experienced at the older hotel in Toronto:

1) All lights are operated by one fader - this doesn't help with lights just above a screen and doesn't work very well with the new CFL light bulbs.

2) Despite a request to unscrew the lights just above a screen, we were told that it couldn't be done because they didn't unscrew. Later on, during the event, the banquet manager brought in a ladder so he could unscrew the lights above the screen, thereby improving the image quality.

3) The sound system was noisy with a ground hum or electrical interference - even when nothing was plugged in, it would randomly change levels. When the nearby electrical cords were lightly touched, the hum came and went; it became a matter of tapping the cables to find the quietest hum.

4) The ceiling sound system was not patched properly for our event, so the banquet staff took it upon themselves to re-patch when they discovered the error 'during' our event. Unfortunately for the audience, this resulted in a loud, sustained high pitch which was constant in one meeting room and intermittent in the other (we were doing two events at the same time). After a few moments, they were able to stop the annoying sound.

5) The service corridors were noisy - staff members shouting at each other, loud two-way radios and dishes clanging were a constant disruption which I had to deal with several times.

6) The doors to the service corridors were noisy when they closed - if anybody used them during the meeting, it was fairly loud and distracting.

Solutions:
First, bring a checklist with you when you do a site visit. Second, here are ways of preventing these situations:

1) Ask the hotel manager what the procedure is for unscrewing or dimming specific lights and request access and/or procedures for whatever lighting controls there may be. Any ladders or 'cherry pickers' must be used in an empty room after the screen location is decided. The floor plan supplied by the hotel must be walked through on site (and projector tables should also be demanded and placed before the general seating!).

2) An AV consultant will be able to test the house sound system right in front of you, so you can be sure it has no obvious problems. Plan for a set of powered PA speakers to be rented as back-up.Ask about EQ settings or external EQ availability, which will really clear up speech sounds.

3) If you are using two rooms for a large even, with 'air walls' removed, be sure to ask the venue to 'tie in' the audio for both rooms, so that all the ceiling speakers work and the signal is not accidentally being sent to another room. This must be done the night before or very first thing right before the event.

4) Noisy service corridors are actually pretty common, since there is nothing to absorb the sound in a service corridor. But, the venue could help the matter by ensuring radio silence during events, turning down loud ringing phones, post signage for staff to be as quiet as possible and be adamant about keeping noise levels down during shift changes (staff sometimes congregate in service corridors during shift changes).

Any of these situations can be corrected with proper communication, which is sorely lacking in even the finest venues.

Buck Moore


Tuesday, January 17, 2012

Speaking from the Podium

Should you speak from the podium or wander with a wireless lapel microphone?

Many presentation experts tell presenters to get away from the podium because it's too restricting and the presenter will be more casual with the audience by being on the floor rather than the stage (among other reasons). Those same presentation experts don't seem to understand about how open microphones work with different sound systems.

First off, when it comes to sound system configurations and room designs, there are many possible combinations and wireless lavalier mics don't work well with all combinations. Some systems are in the ceiling, some at the front left and right of the room, some in the middle of the stage, etc. Some rooms are dead-sounding, some lively and bright, some have low ceilings and some have flutter echoes (those repetitive echoes between hard, parallel surfaces - clap your hands in any room to find them).

Second, when it comes to presenters and public speakers, there are many different loudness levels, clarity and dynamic properties of the human voice. So, if a person doesn't speak loud enough or very clearly, wireless lapel microphones won't do much good. A presenter needs to be loud and clear, especially with wireless lapel microphones, because the microphone is under their chin and not directly in front of them.

A good podium microphone has the advantage of being directly in front of a speaker's mouth as well as being perfectly stationary, in an optimal, fixed position, away from loudspeakers; any roaming microphones will present problems if they are too close to a loudspeaker.

Let's look at the advantages of being behind a podium versus being on the floor in front of the audience:

Presenting from behind the podium
- you can hide your notes
- you can have a computer screen right in front of you
- the microphone is right in front of you
- there are no batteries to ever worry about
- a podium light can illuminate your face so you are visible from the back of the room
- you are a foot or so higher than the audience, so everybody can see you
- you can take your shoes off (okay, I threw that in just for a laugh!)

Presenting from the floor, in front of the stage
- wireless lapel mics may feed back when too close to a speaker
- you are not lit properly, sometimes (in larger rooms)
- if you don't project and enunciate, people at the back won't hear you well
- if you move your head to the side, you will be further away from the mic (because podium mics are right in front of you, you will never forget they are there; not so with lapel mics)
- if the batteries on the body pack die, well...
- if you make a point by hitting your chest, you will hit the mic
- your wardrobe or jewelry can hit the mic intermittently
- if you put it on your lapel, it is off centre, and therefore you are more likely to be 'off mic'
- if you forget you have it on, you might be in the bathroom with a live mic!!

 Anyway, hope this helps shed some light on the benefits of speaking from behind the podium. There is nothing wrong with speaking from behind the podium. If you must be wireless, a hand held microphone is a great option, because you are pretty much forced to keep it directly in front of you. Cheers!!

- Buck Moore
(Live Event AV Specialist with direct experience from over 4,000 events)


Wednesday, September 21, 2011

Last Minute Presentation? Be Prepared!

The beauty of the USB key is obvious - presenters can make last minute changes and bring their presentation to a host computer last minute (but, with virtually no time to check it out to make sure it works).

PROBLEM
Here is a situation from an event in September, 2011 where a PC-based PowerPoint show was created as a .pptx and handed in to the host computer the morning of the event with no time to check it out. The host computer was a Mac with an older version of PowerPoint that only reads .ppt (not .pptx).


The slide show was too big to email and there was not time to FTP.  The slide show was eventually transferred to another computer, which could save it in various formats, but ten minutes had passed (the error was discovered during the preceding presentation).

One might suggest that a presenter call ahead to ask what computer and software is being used, but there is no guarantee that the same equipment will actually be in place on the day of the event. A better solution is to have a plan B as well as a plan C.

SOLUTION
Save the slide show as .pptx, .ppt and .pdf, and put them on the same USB key. If the slide show has audio or video in it, the .ppt will still play the media, but the .pdf will not (unless something has changed recently that I am not aware of).

Another note about Macs - bitmaps need to be converted by Quicktime or else they won't show, so only use jpeg images (you'll still go through the 'converting metafile' process on the Mac, though, so allow a few seconds for the Mac to prepare the images for display).

- Buck Moore

Wednesday, May 18, 2011

Two Screen AV Ninja Set-up

The benefits of the AV Ninja set-up:

1) Low profile AV gear - the AV technician sits behind a projection screen, which frees up space in the room as there is no need to skirt the AV table at the back of the room. Also, there is no need to run cables to the back of the room, reducing floor trip hazards and unsightly cables.

2) Direct assistance from the AV technician - because they are set up beside the stage, they are able to assist presenters and public speakers at a second's notice. They won't have to walk briskly through tables chairs from the back of the room, thereby keeping the show smooth in the event of problems arising.

3) Save money on AV services - since there aren't as many cables to route through the room and tape down, set up time is reduced and tape costs go down. It's much easier to hide cables behind stages and skirts than it is to tape them down. In fact, many of our set-ups have only 2-4 cables exposed on the floor, and those are for the AV projector power and signal. When using projectors with 'short throw' lenses**, the cabling  is reduced even further as the projectors can be much closer to the screens.

(** - I've had great success with InFocus short-throw lens projectors, and I would choose them over wireless projectors, until I am satisfied that the wireless projector technology can handle video and has good security).

Thursday, April 7, 2011

How to Set Up a PA System with Free or Cheap iPhone Apps


I have a 3G iPhone now because of the toolkit I could have in my hand when working on AV projects. For live sound gigs, it is very small and convenient to use and I now prefer it over my cumbersome laptop and hand held SPL meters. 

Don't get me wrong, I will always use my probe-mic ANSI IEC Type II SPL meter for paid consultations along with my Radio Shack analog meter for details, but when I set up a sound system, I usually try to identify gross fluctuations rather than fine details, so the iPhone app seems to give me my feedback problems and my 'boxy' frequencies to correct.

Method for ringing out feedback with RTA Lite:

1) With amplifiers turned up and balanced properly (unity gain or thereabouts), turn up the master volume fader of the mixer to unity (or '0dB' or about 75% up, depending on the mixer), turn up the mic channel fader to maximum setting (unity or +5dB, depending on how you handle your gain structure), then increase the mic channel trim pot slowly until mild feedback occurs (a slight ringing only!!).

2) Cup the bulb of the mic carefully to induce more feedback, but don't allow spikes! With the RTA Lite app, see which frequency is reacting the most and cut by about 5dB. 

3) For Low frequency resonance, be sure the high-pass filter for the mic channel is disengaged and say some low-toned words directly into the mic to see what is reacting ans cut those frequencies a bit just enough to stop the 'trail' of resonance. For 'boxy' sounds, say words like 'walk' and 'dog' to identify where to cut and what bandwidth of frequencies.


For estimating maximum SPL and headroom with Studio Six SPL Meter:

1) For live bands - set the meter to 100dB on the dial and sing very loudly (or shout, if you can't sing). A very loud singer should be able to sing just over 100dB, A-weighted. The bass drum (or loudest low frequency transient sound) should be between 106-110dB, C-weighted. Anything louder than that and you're on you're own.

2) For speeches - set the meter to 60dB and speak into the main microphone at a distance of about two feet from the mic, to simulate the worst case scenario. You should be reaching conversational level throughout the room (between 55-65 dB, A-weighted). Anything quieter than that and people will complain (get the speaker to talk closer to the mic).

3) For media soundtrack playback - set the meter to 70dB, A-weighted and set the playback levels to about 60-65dB for dialogue. Switch to C-weighted and adjust low frequency EQ so it runs at about 65-70dB (depending on the soundtrack mix). Business presentation media will be as compressed as a TV commercial (around 5dB of dynamic range) and feature films will be as follows - 60dB for A-weighted dialogue and up 80dB C-weighted or more for the loudest sound effects.

The results you get will be fairly accurate and you should get great results for less than five dollars of iPhone apps.

One last note - do you need pink noise to ring out a sound system? The answer is: maybe, maybe not. Pink noise will help to EQ a system to a 'flatter' response, but flat doesn't always mean it will be good-sounding. In fact, trust a reference song or pre-recorded speech when it comes to tuning for naturalness and clarity.

I'd want to tune a large concert system or a movie theatre with pink noise, but not necessarily a night club or conference room. I mainly aim for four areas of correction in this order: upper middle frequency feedback, boxy vocal sounds, low frequency resonance trails and proper SPL delivery, and the two apps I use help me do just that.

Buck Moore

The USB Key, Woe is Me!!


Oh, the USB key! Both the savior and bane of my AV existence. When I started working with computer presentations, as a part of live events, I would get last minute PowerPoint updates on floppy disks and CD's, with only a small handful of presenters who were savvy enough to carry USB keys. Clearly, those savvy presenters were a sign of what was to follow.  

Once upon a time when data projectors with 800 x 600 native resolution ruled the day, having floppies and CDR's to upload data was somewhat precarious, and hot-swapping PC computers with 15-pin VGA cables was a recipe for disaster. 

As we entered the age of the highly portable USB key, 64 MB beat floppies and 128 MB was a luxury for some. As things progressed, storage increased dramatically, prices plummeted, USB2 picked up speed (punny!) and audio-video files for playback became commonplace. Oh, what a wonderful, digital world! Or, is it?   
Having these fast-loading hot-swappable little memory banks is necessary  for the fast-paced world of live events, but they can also be and excuse for being unprepared! Since presenters can keep making countless updates, it is a very simple matter to hand over a USB key to an AV technician to load onto a host computer, unless the technician gets five at once with no labels, unclear file names (and hierarchy), font changes, .pptx files, missing PowerPoint images, unlinked AV files and the list goes on. 


The technology has gotten smarter and faster, but it can also be a crutch when half a dozen presenters leave everything until the last minute and thus, to chance. The newer technology doesn't matter when the planning has been compromised and results in details falling through the cracks or the wrong presentations appearing on a huge projection screen.

With that all being said, here are some great tips for presenters and meeting planners who are a part of all-day events with multiple presentations:

1) Avoid interrupting anybody who is actively loading and double checking a presentation. Instead, develop a system* for updates and last-minute presentations with an AV control sheet and sticky notes, or little Zip-lock (tm) baggies with presenters names marked on them. Nothing should be left to memory.

2) Ensure all media files on the USB key are linked to the presentation software. The presentation file and the media files should be in the same folder, usually located on the desktop for easier access. If the media files won't play, start the presentation from the USB key directly, plan a workaround so the technician can assist in the playback manually. 

3) Ensure all the files are sensibly named on the USB key and put into a folder that makes sense when someone else is looking for it. 

4) Bring a USB extension cable if your key is wider than average or it won't fit into the USB port with other peripheral devices beside it. 

5) Label the outside of the key or put it in a labeled envelope (or baggie) with first and last name, and name of the file.

6) If the USB key is password protected, make arrangements for someone else to open it when they need to.

Hope these tips help you to experience a smooth conference or other business meeting!

Buck Moore,
B4UShowit.com

* One such system I developed involves numbering preloaded presentations for every presenter. If presenter #1 and #4 have preloaded presentations on a host computer (or master USB key), but #2 and #3 bring theirs on the day of the event, the numbering order should be the following: 

Presenter #1 - 1
presenter #2 - 1a
presenter #3 - 1b
presenter #4 - 2

Both the AV sheet and the computer files should be re-named with the numbering system as the prefix for each. That way, they will show up in numerical order and can be located quickly and tracked as to when they were received. If the first presenter of the day did not have a pre-loaded presentation, but brings on the day of the event, the should be numbered "01", so the order is always right.

.


Wednesday, January 26, 2011

When to Use Slide Shows for a Presentation

Some folks balk at the idea of using PowerPoint or Keynote for visual aids during a presentation. Such people are usually snobby speakers, frustrated meeting planners or jaded AV technicians who believe a person should just be able to jump up to a podium an deliver an electrifying speech.

Public speaking has come a long way and while it is true that many visuals shown to audiences are unnecessary because printouts are already supplied (that or the presenter reads the slides anyway), visuals have their place and often become a crucial method of idea support for modern audiences.

During such events as medical conferences, digital media summits or sustainable technologies meetings, slide shows are as integral to the experience as the person on the stage presenting. Great graphics and detailed pictures will help a presenter open a window into their industry sector that speech alone usually cannot accomplish.

So, the next time somebody suggests that a slidwshow presentation is a crutch, ignore them. BUT, you must know how to use the slides to facilitate a successful presentation.

Ask me, I can help!

- Buck Moore
buckmoore.net

Thursday, January 20, 2011

Review of the Coby Kyros MID7015 - Battery Life of the Coby Kyros MID7015

Battery Life of the Coby Kyros MID7015

I wanted one, I got one. My main concern was battery life, since I intended to use it for light note-taking and light web surfing and maybe a few more apps, but not for gaming or jamming full of stuff that I shove into my laptop.

Stated Battery Life - 7 hours

Battery Life Test Results - from full charge to 'low battery warning' - 6 hours, 45 minutes.

Test procedure - fully charged unit and turned it on at 8:30 am. I used it intermittently for light applications and I was hooked up to the wireless internet. Screen brightness was 50%. Every so often, I checked the level indicator. I kept it awake the whole time (if it went on standby, I'd wake it up right away).

8:30 -   100%
8:48 -    90%
10:14 -  70%
11:11 -  50%
12:55 - dipped to 25% or a second or two, went back to 50%
1:30 -   50%
1:48 -   25%
2:03 -   25%
2:17 -   25%
2:36 -   25%
3:15 -   12% (approx - 1/8 the scale, so math equals about 12.5% or so)

It may have lasted until 3:30 (7 hrs), but most people would want to charge it when it gets that low so as not to chance losing data. So, 6 hours, 45 minutes of usefulness on battery with 50% screen brightness hooked up to the wireless web connection and doing light work.

I did this because I wanted to know rather than hear what people say or belive ads. Oh, and by the way, when not in use for more than an hour, turn it of - the battery will die overnight when left on standby.

- B. Moore

Saturday, July 17, 2010

Preparing a PowerPoint Slideshow for Video Editing

If you're a presenter or public speaker and you intend to videotape your business presentation, including your PowerPoint slide show (or Keynote slide show for Mac), here are a few tips for getting the best results and saving time (and money!) on the editing of your video.

Video Framing and adjusting

First, it should be noted that the best looking videos are with the camera frame on a medium close-up of the presenter (mostly, but wider shots for variety) and the slides with the text leaving some room for the video to be superimposed onto it, rather than the video camera trying to capture the speech and the slides all at the same time (the camera will have to continually be adjusted to get both light and dark areas and be focused every time). (Sample listed below).

Pre-editing the Slides

The font should be as simple as possible and large enough to see when the video frame is reduced in size for playback (the large screen in the meeting room will look very different from a DVD or video file playing back on a TV or computer).


As mentioned, leave room for the video image to appear on the slide (this is where the medium close-up will look best as it will be shrunk, usually). Avoid using the whole slide for text as some TV's will cut off borders of the final image (use two slides, in that case, but do it before in case any viewer is reading the slide show print out along with the video).


Using Microphones
Podium microphones - speaking loud and clear at a podium will allow you to be a foot or two away and still get great results in both the meeting room and on the video. If you aren't loud enough, but stay far away from the mic, the sound of the room will be picked up too much and sound noisy on the recording (and in the room, but not as much since the people are already in the noisy room).

Don't leave the podium mic unless you have a lapel mic as back-up. If speaking really close to the mic - avoid popping P's and T's, by aiming the mic up, so it sits just below your mouth - this will look better on video as well.

Lapel microphones - the best position for lapel mics (or 'lavalier microphones' or 'lavs'), is about a few inches below the knot of a tie, in the middle of the chest (for men) and the lapel that is closest to the screen (for women). Try to avoid hitting the mic during the presentation and consider removing anything that may interfere with getting a clean sound. The microphone should be unobstructed at all times.


For a video example of Better Presentations - see below!

Q&A Sessions
Always ask attendees to 'please use the Q&A microphone' (usually a wireless hand held or mic on a stand for political meetings). If they refuse, or suddenly burst into a question, reiterate the question for the benefit of the viewers (and it helps the editor spend less time on subtitles - or, they will have to listen to the words and spend much time figuring out a 'lost voice' in the background).


Before the Q&A session, it may be wise to ask attendees to refrain from long dialogue that can be dealt with in a one-on-one meeting, especially if they go on and on without the support of a microphone or simply do not include the Q&A session on the final video and treat it like a 'you'd have to have been there' experience.


If You Have a Cold
Always leave a second or two before and after you cough or clear your throat so the audio waveforms can be easily seen on a computer and dealt with quickly. This will save an incredible amount of time during editing. Also, avoid saying 'sorry' or 'excuse me' right before and after coughing or clearing as the waveforms will be jumbled together and take longer to identify. Instead, simply let the audience know that you will cough from time to time before you present.


Have great presentation! - Buck Moore  (watch a sample of edited video)

Saturday, February 27, 2010

Invisible AV - How to Plan a Stealthy Loudpseaker Set-up (by Buck Moore)

A traditional loudspeaker set-up for a business meeting might include a left and right speaker on either side of the stage or the use of the ceiling-mounted distributed speaker system already installed in the venue. Often, the former are medium-sized cabinets that can obscure viewing angles and the latter can sometimes sound 'tinny', if not simply cut out sound from time to time (the audio controls are usually pre-set and can collect dust, which can cause the sound to be intermittent even at the finest of venues).

Aside form being very 'present' in a room, medium-sized speaker cabinets can have annoying little lights on the front of them and their larger speaker stands can create extra trip hazards. Using smaller speakers with high audio output can allow the AV technician to create zones of audio and adjust each zone independently and on-the-fly as needed. Also, smaller speakers won't obstruct viewing angles and can sit on smaller stands or even small tables, which are unlikely to be tripped over.

Large speakers at the front are usually only useful for live music and DJ's, where a full sound is desired, but for speaking voices and multi-media, they are very often unnecessary. Ideally, speaker zones should be planned with a combination of powered and non-powered speakers, especially along air-walls, where running power drops to them can be a pain.

Below are two examples of zones created with powered and non-powered speakers from initial planning to implementation:


The bottom example was planned for front projection, but we actually decided to go with rear projection because we had the room behind the screens - it was an aesthetic choice by the meeting planner and would allow for more tables near the front (not to mention the venue politics involved in getting the event up and running).

Using smaller cabinets, distributed throughout the room and aimed properly (to even out levels and avoid audio delay effects) can cover large audiences and minimize the appearance of loudspeakers everywhere. Proper planning of an audio system cannot be left to chance and following these simple guidelines can make your next meeting an AV success!

- Buck Moore can be reached at www.b4ushowit.com.

Invisible AV - How to Hide an AV Set Up and Save Money at Your Next Event

Invisible AV set-ups, where the AV person and main loudspeakers are hidden from view behind the screen, ensure quick reactions by the AV technician to any problems which may arise as well as having the appearance that the show is running by itself.

Two major concerns among fellow technicians include a lack of proper monitoring out front and loudspeakers not on stands, above the ears of the audience - two issues which shall be addressed here.

The following picture illustrates some of the benefits of hiding the audiovisual technology behind the screen (in this case a rear-projection screen) - no cables taped to the floor and no speakers on stands. Showing too much technology tends to look less streamlined, which is why some AV companies and operators insist upon setting up a 'skirted area' at the back of the room so they don't stand out too much, but they are still very much out there.


Going with a rear-projection set-up such as the this won't work in all rooms, however, and must be planned out carefully so that a given projector can fill the screen from behind. The screen shown is a 6 X 8 foot Dalite Fastfold. To fill the screen, there needed to be about 16 feet behind it using a projector with a 1.1:1 zoom ratio, which means the projector lens can make the image 10% larger than the smallest image setting. For rooms with less area behind the screens, a zoom ratio of 1.6:1 would be needed, so that only 12 feet would be needed behind the screen.

The primary loudspeaker was positioned behind the skirt* of the screen and aimed out toward the seated audience, while a second loudspeaker was above the rear half of the audience, aimed down and hidden behind the golden handrail, which is just out of frame to the right. The ideal set-up would have included an audio delay to keep the 'fill' speaker from being noticeable, but turning it lower in volume than the main speaker also works well.

* the skirting for the screen frame should be thin enough to avoid cutting out the higher audio frequencies that are needed for audio intelligibility 

The invisible AV set-up has some distinct advantages over the traditional back-of-room AV set-up, including:

1) There are fewer cables to route to the back of the room - this should save some money** because there is less to set up and there will be no unsightly cables taped to the floor that people can trip over. 

** individual AV companies differ in this respect, so ask a lot of questions

2) The AV technician can respond immediately*** if technical problems should arise - this saves time and keeps things running smoother as the technician doesn't have to run to the front of the room to fix the problem (this is especially important where there are no proper aisles planned when setting up tables).

*** not all AV staff will help with EVERY aspect of the technical side of things - for example, some technicians will not do much about trouble with multimedia playback that doesn't go as planned

3) The projector doesn't take up room in front of the screen - if you decide that rear-projection is right for the room and event, you will not have to worry about somebody bumping into the projector table (or cart), nobody can trip over the cabling and there will be more room for an extra table or two for the audience.

To sum up, the invisible AV set-up is a streamlined way of running the technical side of an event that can save you money on set-up and strike, look as though it is running by itself and has the benefit of less cabling exposed. Even if you must use front-projection because of the room size, you can still minimize exposed cabling and still have the AV technician close by.

Monitoring the event is quite easy as the AV technician can do an occasional walk-around to ensure proper audio levels and, in the case of two-screen set-ups, can angle the screens 'in' to be able to monitor what's being projected from behind a screen (see picture below). The invisible AV set-up is ideal for meetings of up to 200 people where the meeting planner needs excellent results within a modest budget.

Here is one more example of a two screen, front projection set-up at an event for 180 people in New York City:

 
I had a clear view of the presenters and the screen content 
with perfect control of the multimedia playback.

- Buck Moore can be reached at www.b4ushowit.com or email: buck@buckmoore.net